Olen lomalla viimeinkin..ja sainpas viimein tehtyä jotain. Kyselin aikaisemmin toiveita blogini suhteen ja ohjeita toivottiin. Joten tänään luvassa siis lahja laatikko ohjeineen.
Kuvat on osittain vähän huonoja, anteeksi mutta en kerennyt ottaa uusia toivottavasti saatte selvää. Ja vaihteeksi tein taas täysin ruskean kortin..Käytin maskaamis tekniikkaa. Lahjalaatikon sisälle tein nappi korvakorut. Mielellään kuulisin mielipiteitä työstä. Ihanaa päivää muruset.
I am on holiday at last .. Gotcha, and finally do something. I asked in my earlier expectations regarding the instructions and it was hoped. So today, therefore, like a gift box with instructions.
The photos are part of a bit bad, I'm sorry but I do not have time to take new, hopefully you will find out. And I made a change, while completely brown card..I used the masking technique. Inside the gift box I made earrings. Like to hear opinions about the work. Have a wonderful day crumbs.


* OHJE-INSTRUCTIONS*

Tee nuuttaukset kohtiin 1/2",1 1/2" ,6 1/2" ,7 1/2" ja 8"
Käännä paperi ja tee sama toisin päin.
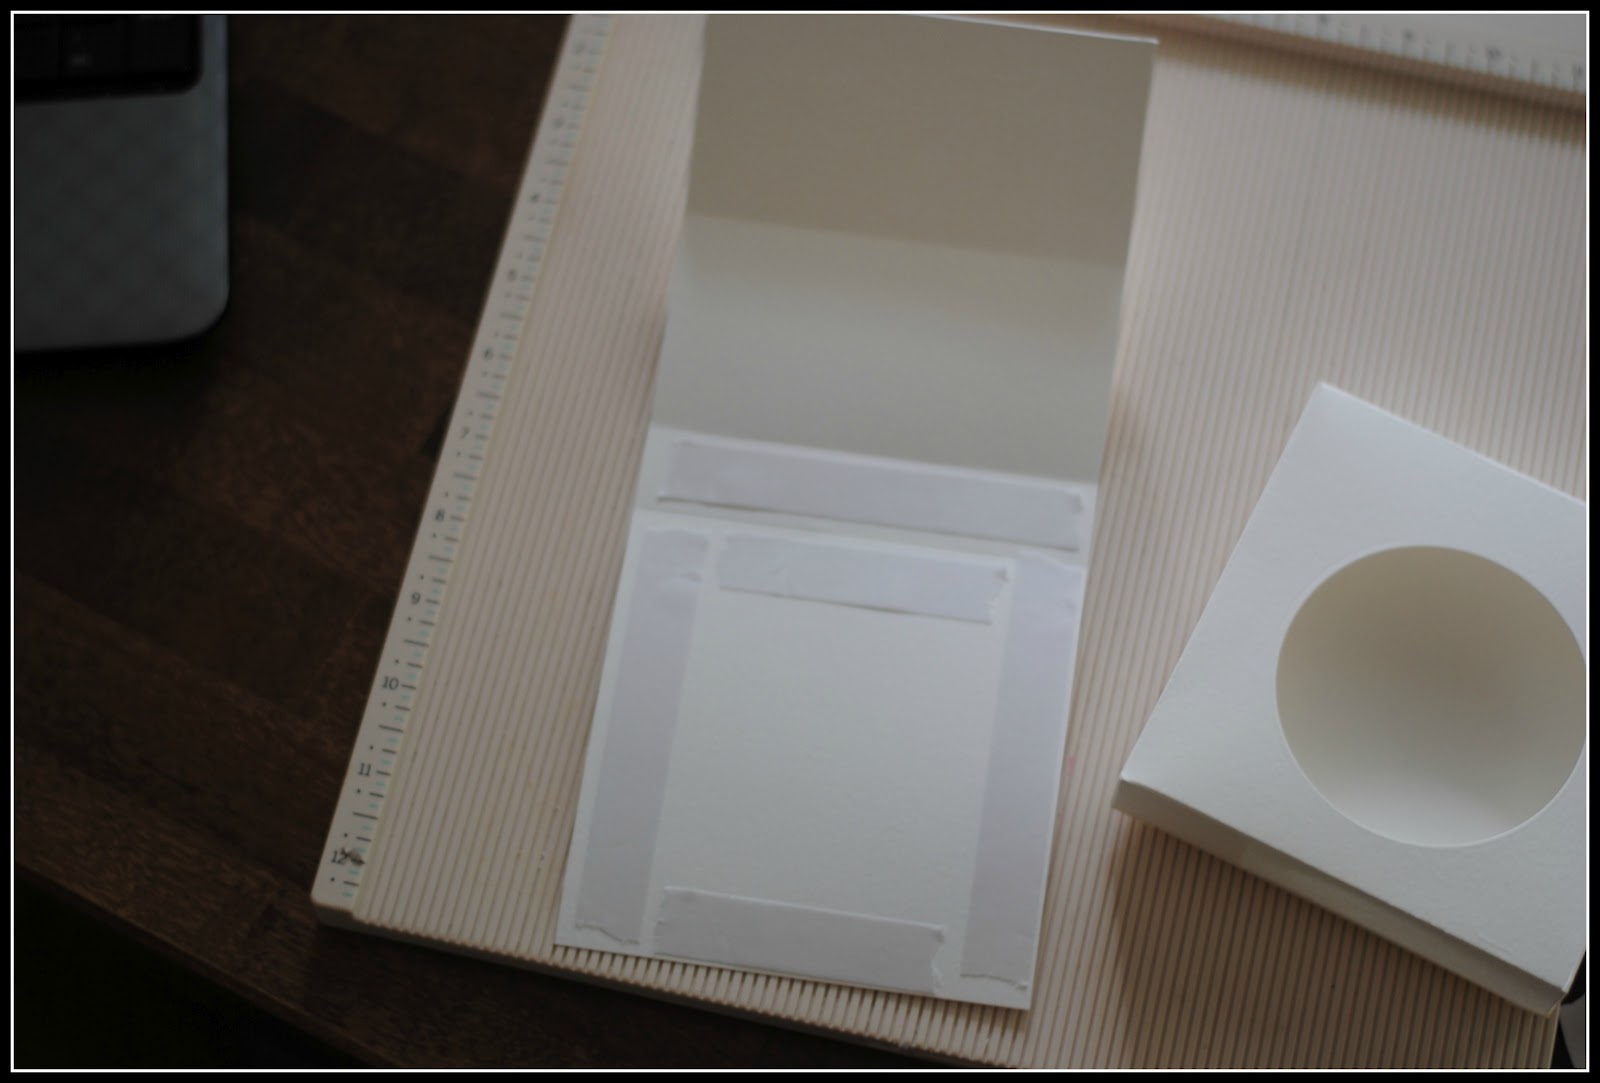
1.Take and cut paper size 8 "x8"
Make lines 1/2 ", 1 1/2", 6 1/2 ", 7 1/2" and 8 "
Turn the paper over and do the same the other way around.


Tee nuuttaukset kohtiin 5" ,6" ja 8 1/2"
2. Cut the card base size of 5 "x11"
Make lines 5 ", 6" and 8 1/2 "

3. Cut out the four point open, the same way as in the picture.

4. Cut a gift to the base 5 "X5"

5. Cut a hole in a gift box, I used the Big Shot mower, but you can make the hole even though the outline of the glass. Fold lines, and at the corners cut off small pieces and add an adhesive tape.


6. Glue the box, before you fold the edges, add a piece of ground in the box. Then fold and glue the outer sides of the pan.

7. Finish the box, I do not adhesive to the inside bottom of the box, but only the bottom of the card.
8. Glue the bottom of the card box.

9. Ready to gift box. Now decorate. Decoration subsequent steps. I hope you got clear, and I would be glad if you would leave me feedback.
Challenges:
http://magnoliadownunderchallenges.blogspot.fi/
http://totallytilda.blogspot.fi/
http://tildastown.wordpress.com/
http://toptiptuesday.blogspot.fi/
http://bearlymine-challenges.blogspot.fi/
Aivan ihana! :) Siis UPEA!
VastaaPoistaItse tein just joululahjoihin kuuluvat pienet korurasiat pikkutytöille. :) Mutta ei ne näin hienoja ole! :D voi kun itsekin osaisi näin hienosti! :)
fab project! love all the gorgeous details
VastaaPoistathanks for playing with us at tilda's town this week
hugs
céline
I love this one Marika!!! Great idea and so many gorgeous details!!
VastaaPoistaThanks for joining us at Tilda's Town this week with your beautiful creation!! Good luck in the draw!!
Hugs, Tina
Beautiful creation! Thanks for joining us at totally tilda x
VastaaPoistaHei ihan mahtavaa saada sulta ohjeita!! Suorastaan hemmottelua lukijoille :)
VastaaPoistaHi Marika! ❤
VastaaPoistaOh! This is one lush box you've made! And how generous to give such amazing instructions too :) Stunningly inked Tilda and an awesome color scheme :) And last but not least: so many absolute gorge details for my eyes to gaze at :)
Thank you so much for joining us at MDUC this week :) Welcome back! ❤
Love, Louise
WOW this is so beautiful, I love your beautiful colouring and all the gorgeous details - like the butterflies and bird cage.... Thanks so much for playing along this week at MDUC
VastaaPoistaHugs
Karen
xxx
Mahtava rasia ja mikä ihana värimaailama.Ihana kun jaat ohjeita tänne meille kaikille niin voi itsekkin kokeilla ihanuuksia. Lisää vain tälläisiä ;)
VastaaPoistaSensasional creation LOVE all the ribbon and also the butterflies and Bling,
VastaaPoistaGREAT tutorial/tip too and Great to see you at Top Tip Tuesday for our Focus on Ribbon challenge this time, hugs Samantha :0)
Absolutely gorgeous!d! Thanks for joining our Anything Goes challenge over at BMD this week! And thanks for the tutorial! Ani
VastaaPoistaUpeaa ja ihanan täyteläistä ;)
VastaaPoistaGreat box, thanks for showing us how you made it. I love all the details, the bird house, the ribbon and flowers. Thanks for joining the Focus On The Ribbon Challenge at Top Tip Tuesday.
VastaaPoistaHi Marika,
VastaaPoistaJust seen this project on the Top Tuesday Blog and I had to pop over and tell you what a beauty it is! Love the brown earthy tones and it's so nice to see them in combination with the Tilda Hawaii stamp! Awesome masking; she's such a cool Hawaii chick up on Edwin's Oldsmobile. :-)
Hugz,
Sandy
Voi valtava, mikä ihanuus! ja kiitos ohjeesta. Itselläni ei ole noita scopaleja tms., mutta olen harkinnut vakaasti, että se(kin) olisi tarpeellinen.....mistä senkin sitten hommaa..
VastaaPoistaKiitos muuten kehys-neuvoistasi, vähän jo harjoittelin....:)
Saw this over at Top Tip Tuesday (which you should have a look at if you haven't yet!). Absolutely fabulous box, unbelievably beautiful embellishments, and a wonderful tutorial too!
VastaaPoistaAlison x
Absolutely stunning chick
VastaaPoistaThanks for joining us for this challenge at
Totally Tilda
Hugs, Becky x
Utterly gorgeous!! I love all the rich browns - even though it's all one colour, it's so colourful! And beautifully made and embellished... and thank you so much for the detailed tutorial photos!
VastaaPoistaAlison x